Sunday, June 23, 2013

Term 8: The Final Chapter


Sculpture 3

I'm so glad I got to take this class for my elective. It's been a long time since I've taken a traditional class, and even longer since my last sculpture class. The purpose of this class was to create a life size bust of a character that was humanoid, and a mixture of an animal group that we pulled blindly out of a hat. I drew amphibian. We were allowed to add a mammal if we wanted. We then sketched out a few ideas, created a mini-bust as a guide, and began sculpting on our large bust.


 You can view my classmates sculptures here: https://www.facebook.com/photo.php?v=10151542618084807

This is Madame Melotoad. She was a classically trained opera singer who over the years has become bitter after her damaged voice ended her career. She currently teaches students and tries to live vicariously through them. 
Concept Sketch 1


 My first rough sketches were aimed at making her part whale and part frog so that I could play around with the inflated neck idea. The problem was she was looking more fishy and sluggish than amphibian and since Amphibian was my category, I had to strip away the whale idea.
 
Mini-bust 

The mini-bust was more of my experimentation phase. I was trying to figure out her hair, her neck, what kind of dress she was wearing, etc. This phase had a very muppety look to it.


The final sculpt came out very different from where I started. It was definitely a journey, but overall I'm happy with the way she came out. People tend to laugh and her expression, so that's a plus!

Saturday, March 23, 2013

Term 7: Portfolio Class Project 5

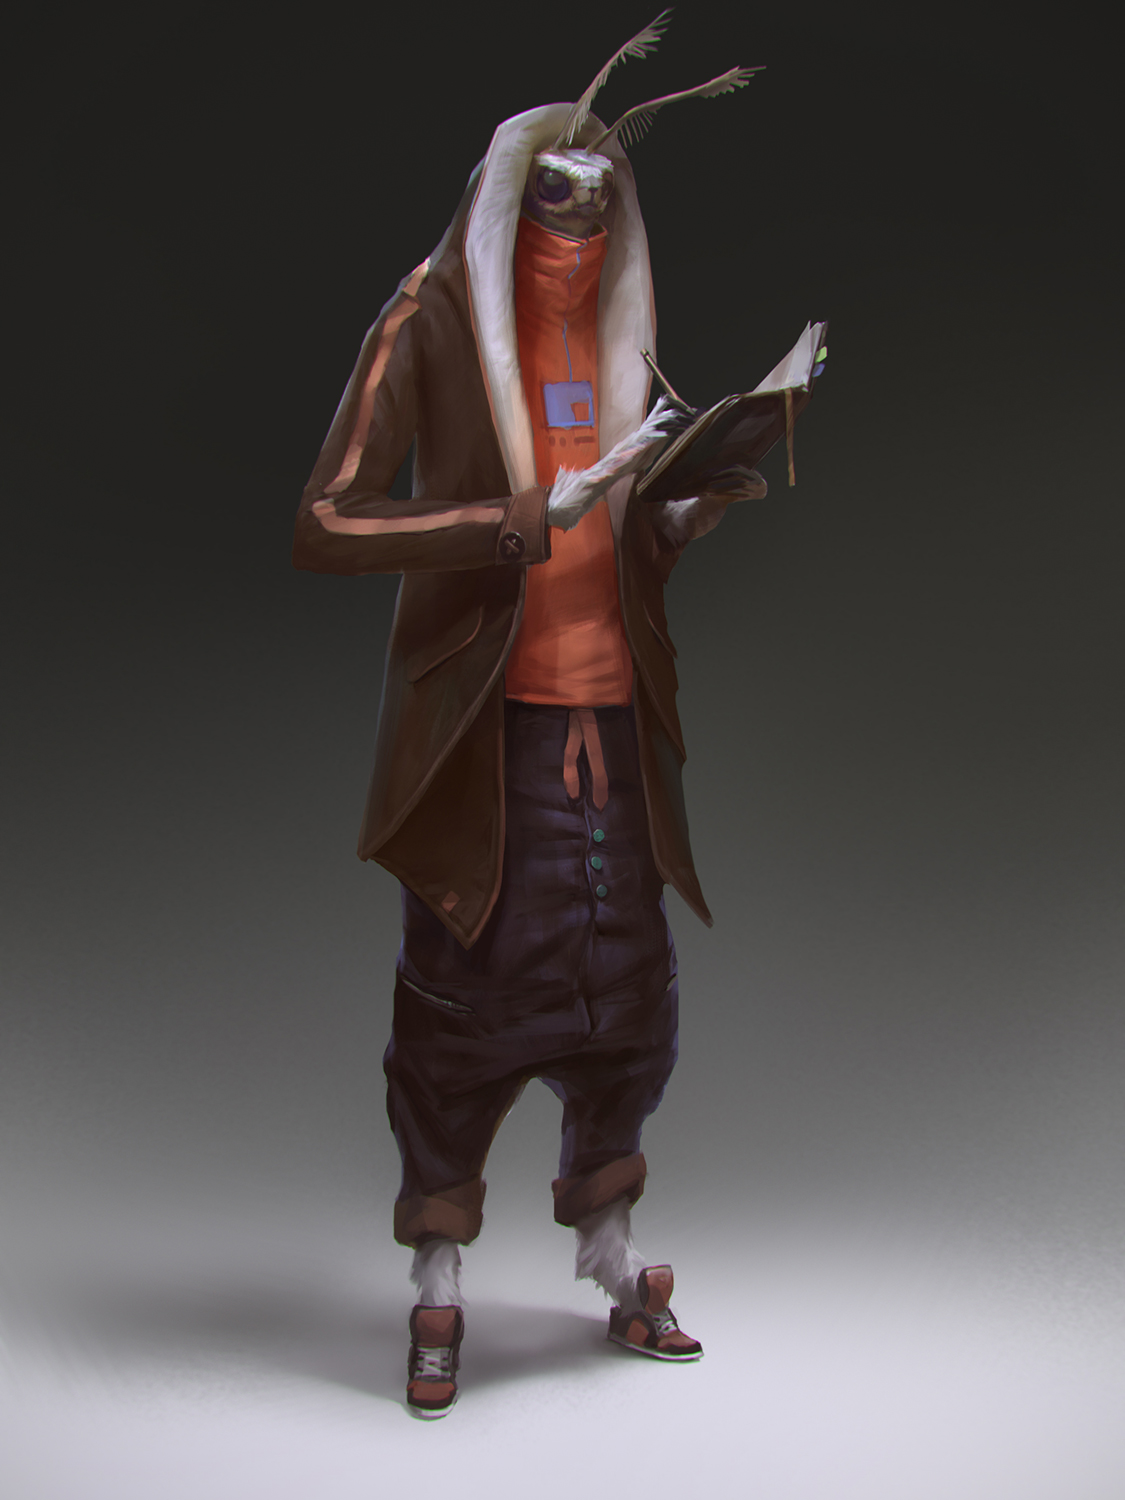
 This last concept I chose is called Butterfly by Zoonoid. I loved this guys incredibly long body and little tiny face.
Original Concept

I started by blocking him out with zspheres in zbrush. The first week of modeling I spent the most time on the face, which may not have been the best idea since his head is so small compared to the rest of him.

The antennae was a bit tricky. I ended up using Shave to generate the hairs and then converted it to polys so I could use my own textures. It had been a while since I'd used vray to render anything and I decided to give it another go. Vray seemed like the best solution for his face, arms, and legs, and I still need to add more to the model. For now, this is the final render, and I hope to go back, do a little more look dev on the materials, add in better fur, and fix proportions to match the original more.

Final Render

Tuesday, February 26, 2013

Term 7: Portfolio Class Project 4

I'm currently working on an gaming project with Gnomon and USC. I was able to tie that project in with the Portfolio class, so this week, I'll be working on one of the playable characters in the game.
Jonathan Kuo provided this awesome concept.
Due to the limitations of poly count, the game mesh can only be 5,000 polys. Here is a WIP for the blockout. Still need to add more hair cards and definition.


Sunday, February 10, 2013

Term 7: Portfolio Class Project 3

Here are the 3 concepts I had to choose from this week. As much as I want to do the cat launcher, I think I'm going to save that for the final week.
I decided to go with the first one, concept by Yunjeong Baek. I'm going to approach this one like a game character. 

Due to a secondary project's schedule, the texturing is on hold for the moment. More to come.

Monday, January 28, 2013

Term 7: Portfolio Class Project 2

Here are my selections for Project #2. The middle one although very cool, seems a bit flat and could be challenging to recreate in 3d. The portrait is Spike from Cowboy Bebop. I love this but it is a bit simplistic. I'm going to come back to it soon.

The first one is my favorite, Guard Duty by André Brown. Once again, the artist was nice enough to give me permission to work on it and post in my portfolio. This time, I wanted to get a practical model for the character, but I lined up the environment as close as I could to the concept. Still need to pose sharky, and add the scar over his lip. This upcoming week is all lighting, texturing, rendering. Stay tuned.


Lastly, lots of texturing, lighting and rendering. The lighting was the hardest part. I ended up using a ton of lights to get all the rim lights, fill lights, etc. I ran out of time to properly pose him and afterwards I realized his proportions were way off. When I get a chance, I'd like to go back and adjust him.

Sunday, January 27, 2013

Term 7: Portfolio Class Project 1

This term I'm going to update this blog a little differently. Since every two weeks I have to create a portfolio piece, I thought it would be nice to give updates as the projects are completed, rather than one big post at the end of 11 weeks. 

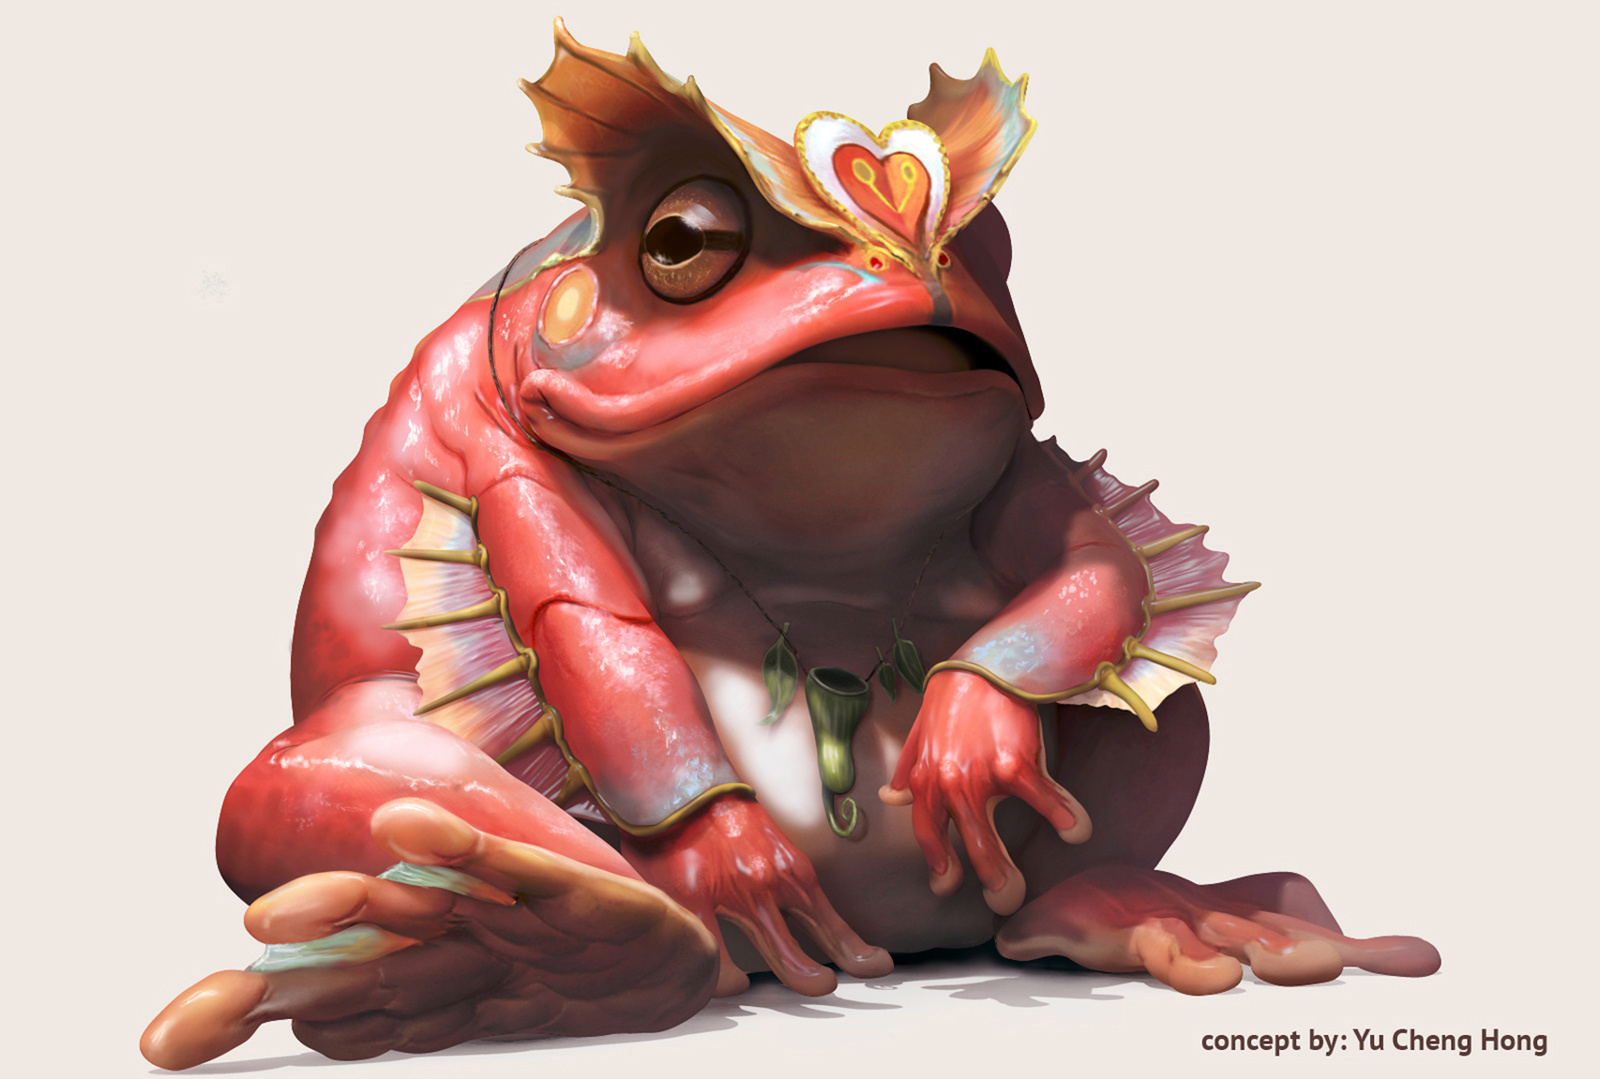
This is the first class our term has taken with Alex Alvarez, the founder of Gnomon. The previous 6 terms have all been leading up to this. Every two weeks in this portfolio class, we have to submit three 2d concepts that we want to recreate in 3d. At least one must be approved, and then it is our choice to model, texture, light, render, and composite one in fourteen days. These were the 3 I selected for the first project. All were approved and I decided to go with Toad, by Yu Cheng Hong, who was nice enough to give me permission to work on it for class.


I had two choices for this project. Either I could try to make a practical symmetrical model that would be able to displayed on a turntable later on and potentially animated, or try to match the concept as close as possible. I chose the latter, which in the end was a little regrettable. I ended up with was a model that can only be viewed from a limited angle, which really defeats the point of 3d. Even so, it was still a very good exercise and I learned a lot about texturing in the process. 


Week 2 was focused on making model changes from our first round of feedback, then we had to complete all the texturing, lighting, and rendering. I had to retopologize a few areas of the toad, especially around the face in the eyebrow region, the arm wrinkles, and the chest wrinkles. Next I unwrapped the model and did a quick texture project to get a base for my texturing, separating the toad on one texture and the fins, eyes, and necklace on another texture. I used Zbrush to fix seams and paint out specular highlights.


Mentalray seemed like the best rendering option since the subsurface scattering shader is a bit better than vray's. The lighting setup included a cream colored background matching the original concepts color, a directional light, and final gather for bounce light. The first round of rendering came out a little washed out, and the subsurface was not as strong as I had hoped it would be. 


Gnomon has a Best of Term competition every quarter and I wanted to submit this before the deadline. The final version is a Photoshop paint over of my first render. I focused on warming up the red color in certain areas, fixing the flatness of the leaves, giving the eyes those flecks of gold that real toads have, brightening up the foot fins, and making him feel more wet and slimy. In the end, I'm really happy with the way it came out. I would like to go back and try to achieve all of these post effects entirely in 3d. Fingers crossed for Best of Term. A big thank-you again to Yu Cheng Hong and a beautiful concept.


Friday, December 21, 2012

Term 6

A year and a half down, 6 months to go. Let's dive in!

Digital Sets

When you see Spider-man swinging around New York or astronauts walking around on a strange planet, a lot of times, that environment is a digital set. It is often a combination of 3d models, background plates, and panoramas. Our class got to take a field trip up to Red Rock Canyon and take photos so we could make our own panoramas. 


My crazy color corrected 360 degree panorama
This can be used as a background element or even as a lighting tool.

Another thing we learned was how to do was camera projection. Sometimes it takes too long to build an entire environment manually, especially if the camera is only going to see about 50% of it. One thing you can do to save time and still get the 3d effect is camera projection.


Take a simple photo:


Build some simple geometry that dips and bulges in the appropriate areas, and then, just like a movie projector, you project that image on to the simple geometry.


I repeated this process for multiple pieces, and created this composition.
With a very simple camera move, you can fake that full 3d effect:

Final Video: https://vimeo.com/54902630


Skinning

This class did not involve removing the skin from roadkill on Cahuenga Blvd. Skinning is the process of attaching a 3d character to a 3d skeleton. The skeleton is what animators use to make the character speak, emote, and dance the funky monkey. This class we focused on skinning a face. We were provided a head and we learned how to build accurate 3d joints, morph targets, and corrective blend shapes. For the non-3d savvy, I make computer things happen. The best part is, when you are done, you can force your character to make silly faces.

 
HD Cinematography

This was a lecture class which was a very informative and in depth look at the history of film, practical and visual effects, cameras, story, etc. We were fortunate enough to take a tour of Pixomondo and chat with an artist in each department. Our final project was to describe a special effects shot, pre-1993, explain how it was done, and how you would try to execute the same effect today.

I chose the original Die Hard movie, and the scene where an armored truck is destroyed by a rocket launcher, and C4 blows up the 3rd floor of Nakatomi Plaza.

http://www.youtube.com/watch?v=RoUTsiV9lFM


It's hard to imagine but back in the day they didn't have these computer things with programs to do compositing so these big explosions were done a few ways. Some of the explosions were actually real. Small black powder bombs were used on the car and the frame around each window of the third floor. Since the owners of the building didn't really dig the idea of the studio blowing up their property, they had smoke explode outward, and bright lights flashing inside. They then filmed explosions separately and used a photochemical matte process to combine the two. The same was done in the shot where Bruce jumps out of the way of the elevator explosion. To dumb it down, Bruce was traced out of each shot and combined with another shot. Fun stuff!


Mel Scripting

I wish that I had the memory, logic, and skill to understand scripting more. This was an excellent class, and even running at 100% effort, I still would not be able to fully grasp this subject. Scripting  is learning about all the little codes that make a computer program work. It really is like learning another language, which I've never been terribly good at either. それは余りにも困難です! Anyway, I do love how much time this can save you. When you're working in 3d, you tend to notice yourself doing the same 3-20+ button clicks in a row just to do one simple thing. When you repeat this each time, you start to think, " There's gotta be a better way". If you know scripting you can take those 20+ button clicks and put it into 1. How much time does that save?!

Our final was to ask our classmates and peers what scripts they would like us to write for them to make their lives a little easier. I chose to create a script that would clean up a lot of little annoyances when going from the program Zbrush to Maya. Here is the most updated version, free to use. I will continue to refine it and feel free to make requests: Zbrush Cleaner

Character for Games

Step one in this class was to choose a character concept. 
Concept by kick433

I have a new respect for game characters. There's a lot more involved than creating something for a portfolio, turntable, or still image. Games have a limit to how much information can be displayed at any given time. There's tons of little calculations that happen in a game. Real-time lighting, normal mapping, particles, animations, and sometimes real-time displacement. So to create a high resolution character that can show off all those juicy details without taking up too much memory, you need to create your character twice. The first time, you create a hi rez sculpt:


Once you do this, you then go back and create a low rez version of your character. This term we were limited to a 20,000 poly character.

To get your hi rez information on to your low rez character, you use a texture called a normal map. It helps fake lighting and depth information. For example. I can have a plane that I want to be a brick wall. Rather than building the grout and the bricks separately, I can create a texture which will fake those grooves. 
This psychedelic image can be combined with a brick colored map and create this groovy effect: 


Another space saver for games is putting every piece in to one map. I created two for this character since she had so many pieces. Here's the final result:
This character still has many days more work that need to go into it, but this was a great learning experience.

Environment for Games

The art of making games is making an object that is structurally simple and visually complex. Games can only show you so much at one moment. There's lots of little calculations that happen in an instant to give you a colorful, believable environment. This class focused on building objects, environments,  and painting textures.


Peri-Telescope
Grave Site

Wednesday, November 21, 2012

20/20 vision has returned!

Some people may not know but I have only been wearing glasses for the last 3-4 years. Recently I was diagnosed with an eye disease called Kerataconus. Over time, the eye weakens due to an enzyme deficiency, causing the cornea to bulge out in the weaker areas. I was first told I might have this while I was living in Indiana, but after a year my glasses prescription did not change so I let it go. Over the last year I noticed my eyesight was getting worse, especially in my left eye and decided to go update my glasses. Once again, I was told I might have Kerataconus. After visiting a specialist, it was confirmed and I looked into ways to stop the progression of the disease. There is a procedure called corneal cross-linking that is used to strengthen the cornea. Upon further research, I found out the recovery time is sometimes up to 7 months, which was immediately rejected due to my busy school schedule.

I then found a doctor who had a non-invasive treatment. Dr. Brian Boxer Wachler uses a unique eye drop formula that, when combined with a certain type of UV light, strengthens the cornea. He also has a procedure called intacs which is a very minor surgery. They insert small moon shaped discs into the bulged part of the cornea, that flattens it back to a more normal state.


When I finally got off my butt and made the appointment with the doctor, he recommended both of these treatments. I did both the very next day, and when I went in the morning after the procedure I had 20/20 vision. I've been crying tears of joy all morning. In an odd way I will miss my glasses, but I couldn't be happier. God was truly watching over me and I feel truly blessed. God bless Dr. Brian and I wish you all a Happy Thanksgiving!


PS. If you are considering Lasik, Dr. Brian has an alternative called Visian ICL. Very similar to the intacts!

Wednesday, September 12, 2012

Term 5

Another term down.  What a roller coaster this was. Lots of projects, lots of classes, and a ton of things going on outside of school that made it a bit of a rough ride. I am super happy that I finally got to really get started with characters and creatures. Let's break it down, shall we?

Scripting


This class was purely lecture based, just to get us familiar with the programming language of maya. We learned the basics of mel and python and I wrote a script to save me some frustrations with modeling and rendering. If you are not a maya user, ignore this next part. ;)


In maya, whenever you import an .obj, Visible in Reflections and Refractions are off. This will cause things not to render properly. This little mel script simply grabs all polygon objects and turns it on. Feel free to use it:

string $transforms[] = `ls -tr`; //lists all the transform nodes in the scene
string $polyMeshes[] = `filterExpand -sm 12 $transforms`; //filters out all the non-polymesh nodes
select -r $polyMeshes;  //selects all the polymeshes

string $selected[] = `ls -sl`;
string $item;
for ($item in $selected)
{
setAttr ( $item +".visibleInReflections") true;
setAttr ( $item +".visibleInRefractions") true;
};

select -cl ;

Character Texturing

  Texturing is quite an involved process. We were provided a model that had cloth, metal, leather, and skin that needed to be textured. Its not just as simple as painting directly on model. You need to paint the specularity, sub-surface scattering, bump, and diffuse.


Character Kinematics


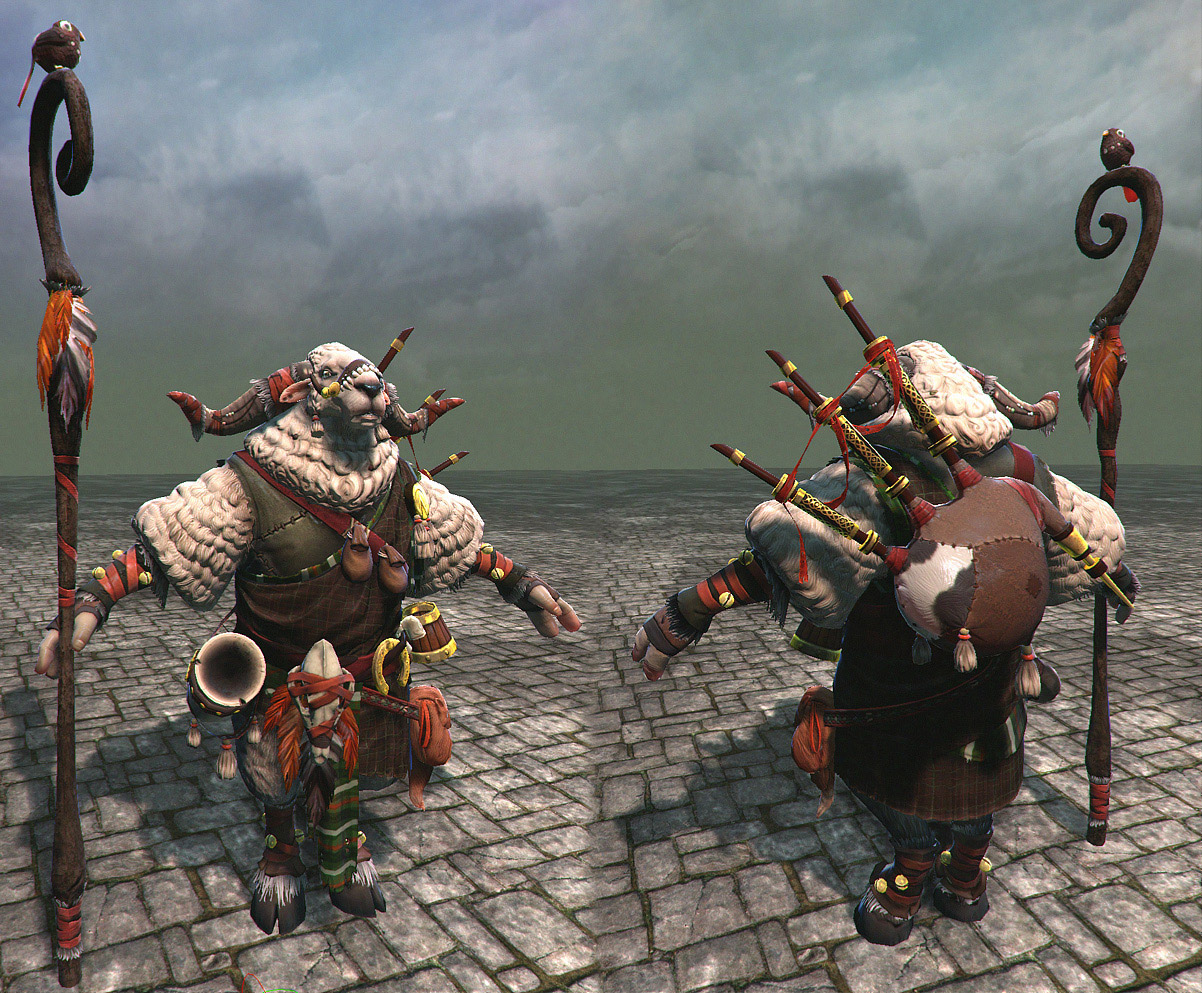
This class was all about building a proper bone structure inside a model so that when it is ready to be given to an animator, it can move, twist, and bend properly. There is a lot of little things that can go wrong with rigging so this class was very technical. I chose an awesome sheep model by Steffen 'Neox' Unger, who was kind enough to share for free. The skinning ( the way the mesh interacts with the rig) will be worked on in next term's skinning class!


Creature Sculpture


Awesome class. Week 1 was very intimidating but set the stage for the amount of hours we would need to put into our homework. My classmates could not have been more encouraging and inspiring. Once we started to see the quality that a few people put into the first couple assignments, it really pushed our creativity and attention to detail. One of the most important parts of this class was story. Our professor, Mark Dedecker, did not want to see simple lifeless models. We needed to make posed characters that told some sort of story, indicated personality, emotion, etc. This was one of my favorite classes and I want to take it all over again! Here are all my projects in order of completion.


 week1: 
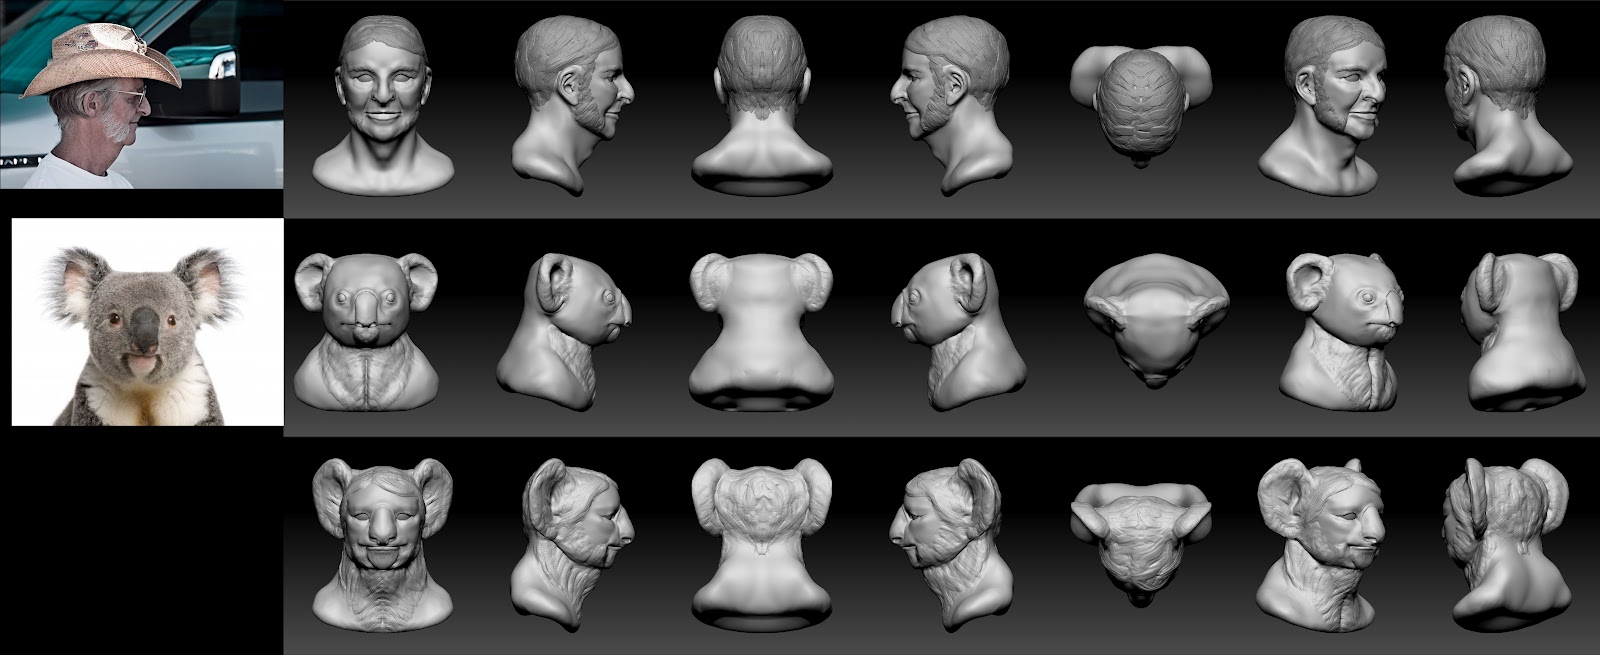
two people sculpts, two animal sculpts,  the morph between each human and animal. After looking at pictures of random people, I determined that this man looked like a Doug, and that his inner animal was a koala. This assignment was definitely a struggle. Especially with the baby. The happy babies I came across looked a lot like a puffer fish to me, but I definitely dipped my feet into the creepy realm with it (a.k.a. the uncanny valley)


Koala Doug Morph


Baby Puffer Morph (hello uncanny valley... live and learn)

 week 2: sculpt an quadroped, sculpt a lycantrope version of the animal, meaning wolf to werewolf, and making a somewhat sentient creature. I can't remember why I chose a baby pygmy, but there was just something really adorable about them. The lycantrope version is named Sherman. His story is he loves hide and seek, but isn't very good at it. Despite his small size, he fails to use it to his advantage.


Baby Pygmy Hippo


Sherman: Pygmy Hippo Lycantrope


week 3: 

Turned this one in last, see the final down below

week4:
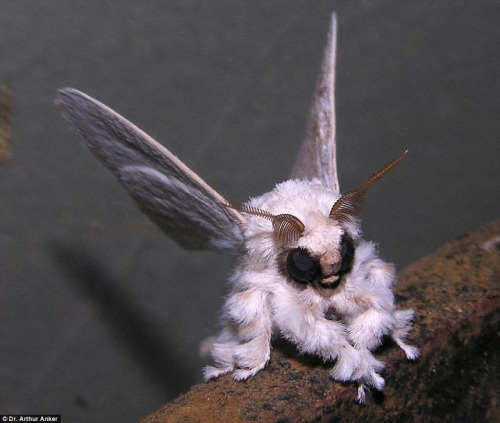
 Bug week. Create your own insect based on actual insects. I chose a praying mantis and fuzzy moth as reference and created the Leg Warmer Manis. Unfortunately these went extinct in 1992.


Leg Warmer Mantis


week 5:

Dragon week! We were each given descriptions of our dragons, all unique. Often times it seemed that the description was a bit of a contradiction which added an extra challenge to the execution. Here is the description I was given:
This dragon has a thin elongated body with a thin tail and neck. its fine gem-like scales are beige. on either side of its tail are sharp, blade-like extensions. this dragon has six elongated, thick limbs with five closely mounted digits on each foot that end in a long claws. it has frill like wings that stretch between its forelimbs and the end of its tail. this dragons head is wide. it has slitted eyes that are obsidian. the back of this dragons head and neck is protected by thick bone. a bony ridge separates its nostrils. two straight horns extend from its forehead.
It was difficult to keep the wings out of the way of the 6 thick limbs while he was supposed to remain long and skinny. He's a bit awkward to me, but at least he can smile about it.


Hopping Glider Dragon
week 6:
Two creatures interacting, making physical contact
So the original weird idea I had as a kangaroo that wore wombats on its feet. The wombat has a pouch as well, but it is backwards. I later decided that I would just make a breed of bunnies that had reverse pouches. Flurn is a grumpy hairless dog-like creature that looks after his bunnies. This symbiotic relationship allows Flurn to keep his feet warm while the bunnies are kept safe in his pouch during the day. They also get to snack on any crumbs that might fall in his over-sized pouch. Pouch buddies for life! The physical contact was important because we had to show the compression of skin against skin.


Flurn and his bunny slippers
week7: 
This assignment was pretty loose. I decided to recreate a 2d cartoon character in 3d. I decided to take the character Brooklyn from the old Disney tv show Gargoyles. Not a whole lot of reference to work with, but I think I made him look as similar as I could. At some point I would like to go back and give him proper hair.

Brooklyn
 Final:
Our final was to revisit one of our projects this term and push it further. Since I had slacked on week 3 I decided to work on my fairy tale/ mythology creature, the Alp Luachra. It is a parasitic fairy that waits for people to fall asleep near a river, then crawls down their throat, into their stomach and eats their food, robbing them of the nutrients. I wrestled with how to make it look parasitic, and decided to go with the leech looking mouth. The additional story I came up with was this creature was once a normal fairy that turned evil, so as punishment, its wings were removed and all that remains are stumps. This creature was described as being newt-like, so at some point I will add the frills down the spine that some of the water newts have.

Alp Luachra

Advanced Compositing

This was our second class where we learned the compositing program Nuke. I truly can't see myself going back to after effects now. Node based compositing is the way to go! Once again, Martin Hall provided projects for us to work through in class.


Look Development

This class was about achieving a particular look with everything from metals and plastic, to cloth and hair. For my final, I decided to revisit the chess piece I modeled from Luke Mancini's concept a couple terms ago. I didn't get nearly as finished as I would have liked, but its a good start. It took me a while to settle on what colors to make everything since I wanted to stray from the concept slightly. Hopefully I'll get to do the other pieces someday.


original concept by Luke Mancini
Queen: rendered in vray